So, we just walked through how to generate a self-signed certificate in the last post. Next, we need to bind that certificate to a website in order to enable SSL on that website. This post walks through the binding the self-signed certificate.
- Make certain you have generated the self-signed certificate:
- Use the steps in the previous post: https://www.orionscache.com/2015/05/creating-self-signed-certificate-iis7/
- Open the GUIL
- Run Control Panel | Admin Tools | Internet Information Services (IIS) Manager
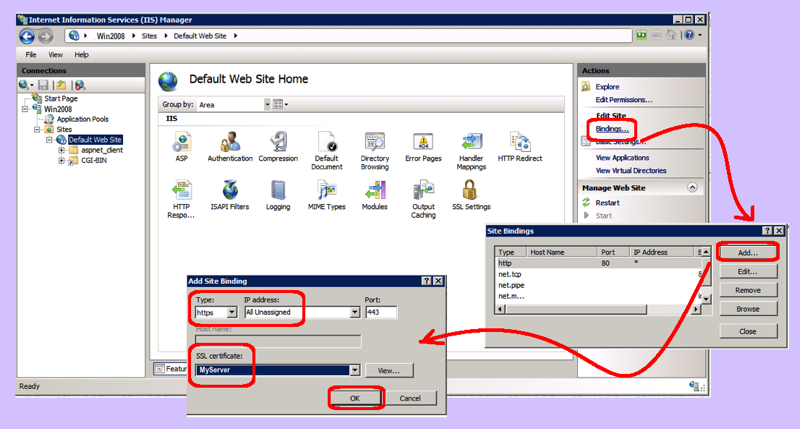
- Highlight your website (on the left)
- Click the Bindings link under the Actions pane
- Add the new certificate:
- Click the Add button
- From the Type dropdown, select https
- In the “IP Address” field, leave the default of “All IP addresses” unless you are connecting different IPs to different websites
- Leave the standard 443 port for SSL communication
- In the “SSL Certificates” dropdown, select the certificate
- Click the OK button
Open a browser and surf to your website using http:// — assuming that works now surf using https:// — and your website should present itself using the new certificate. Note that since it is self-signed, security features in your browser may warn you that it is untrusted. To resolve this, you can add the certificate to your list of trusted certificate authorities on the machines which access this website. This solution is not useful for a publicly accessible website, but is useful for testing purposes or for a small business intranet website where the number of end user machines is very small.