I needed to add https:// support to a website, add redirection, and test that everything functioned. I was in a hurry to complete this testing, so didn’t want to deal with purchasing a third-party certification. So, I thought to myself, “No problem, I’ll just install a self-signed certificate!” Here are the steps, if you need to do the same in Windows 2008 Server.
- Open Server Certificates:
- Control Panel | Admin Tools | IIS Manager
- Highlight the name of your server on the left-most list
- Click the “Server Certificates” icon
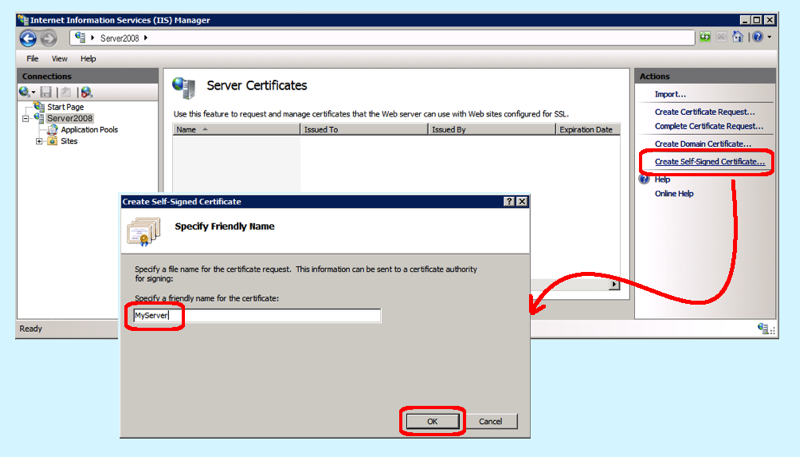
- Create the Self-Signed Certificate:
- Click the “Create Self-Signed Certificate” link under Actions
- Enter a friendly name (you could use the name of the website for example)
- Click the OK button
Once you have generated the certificate, it won’t automatically protect your website. You need to bind the certificate to the website and (if you want redirection from http://) also specify the redirection. These additional steps will be documented in the next blog post.