Recently, I needed to write a script that queried the VMware infrastructure. So, I needed to install the VMware command line interface (CLI) on a Windows machine that would have a scheduled job that ran the script. Whether you are installing the VMware CLI or upgrading the VMware CLI the process is the same, so follow these steps:
- Download and Run:
- Download from: https://my.vmware.com/web/…
- Run Windows Explorer and navigate to your downloads directory
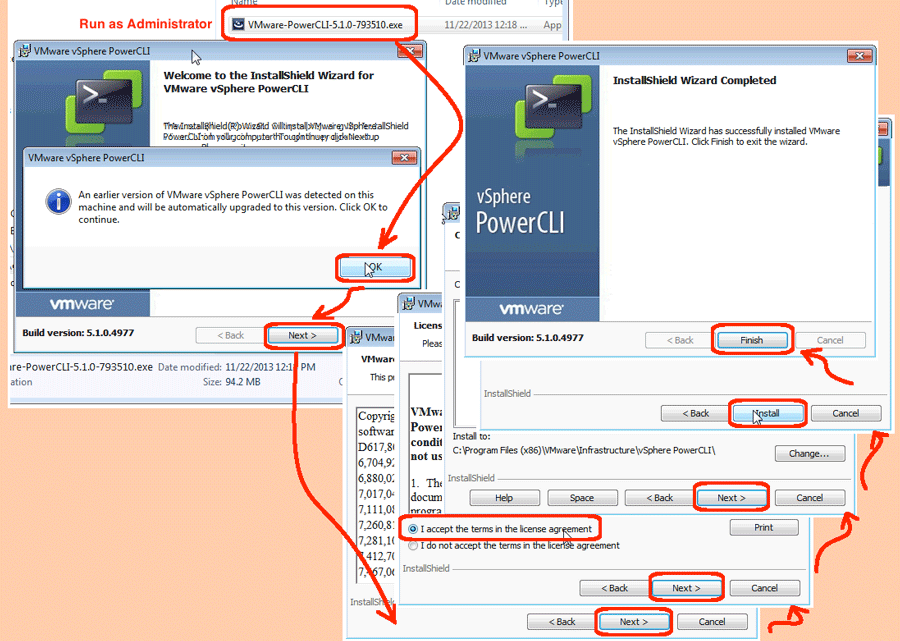
- Run the VMware-PowerCLI* executable as administrator
- Complete the Wizard:
- If it detects a previously installed version, it warn you, click OK
- Click the Next button
- Click the Next button
- Accept the licensing and click the Next button
- Accept the default install location and click the Next button
- Click the Install button
- Click the Finish button
There is no need to reboot the machine once the installation is complete. You can see the newly installed components by looking in the Start | Programs | VMware menu. If you have any problems with the installation, validate that you are using right-click and the “Run as Administrator” menu item and that you are indeed an administrator of the machine on which you are attempting the installation.