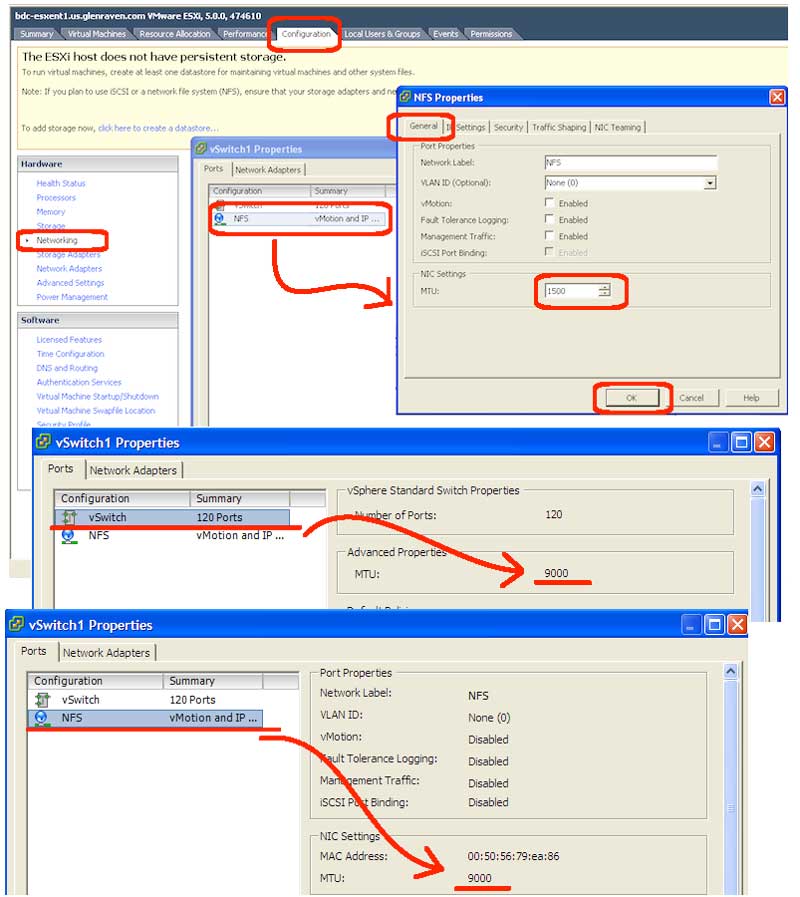
VMware ESXi 5.0 has the ability to setup jumbo frames without using the command line. The first time I tried it, I charged the maximum MTU settings on the storage array, in the network equipment, and on the VMware vSwitch. It didn’t work and I was frustrated. After a little research, I figured out that you need to change the settings in both the vSwitch properties and also in the Port properties. Here is a step-by-step guide.
- Use the vSphere Client 5.0 to connect directly to a ESXi host or to your vCenter server.
- Edit the network settings:
- Highlight the ESXi host.
- Click the configuration tab.
- Under Hardware, click the Networking link.
- Click the Properties link on any vSwitch.
- Set jumbo frames in the vSwitch:
- Double-click the vSwitch item to present the “vSwitch# Properties” dialog box.
- Edit the MTU (I tested with a value of 9000).
- Click the OK button to save this change.
- Set jumbo frames in the Port:
- Double-click the Port item to present the “Port Properties” dialog box.
- Edit the MTU (Set to the SAME value as above — I tested 9000).
- Click the OK button to save this change.
- Validate your changes.
- If you highlight the vSwitch, you should see the MTU = 9000.
- If you highlight the Port, you should now see the MTU = 9000.
(Note: look at the screen shots.) - Click the Close button to close the properties dialog box.
So, now you can test jumbo frames. Assuming you have setup your network equipment and storage equipment to 9000 MTU, and have defined either NFS or LUN attach points, you should be able to attach storage in VMware by using the Configuration tab | Storage link. Once storage is attached, test it by creating a new blank virtual machine in that new data store.
